

Minefields
I’m going to go through each of the mission objectives one at a time. So, 12 articles in total that won’t be done quickly. I’m going to shoot for one per month. If they come quicker great. In each of these posts, the reader is player two and the opponent is player one.Lets start with Minefields, which is far and away the most useful of the objectives because it fits well into any list and gives the second player an intense amount of board control. The misconception that Minefields gives a lot of players is “fitting into their list.” While that mentality is true for most of the other objectives, in the case of Minefields, the question should be what can I take from my opponent. Minefields is flexible and allows you to use it in response to any list by both causing damage and fiddling with position. While this approach does require some guess work, it’s not hard to deduce that a Rebel Ackbar list would like to move in a way that allows them to keep you in their side arc.
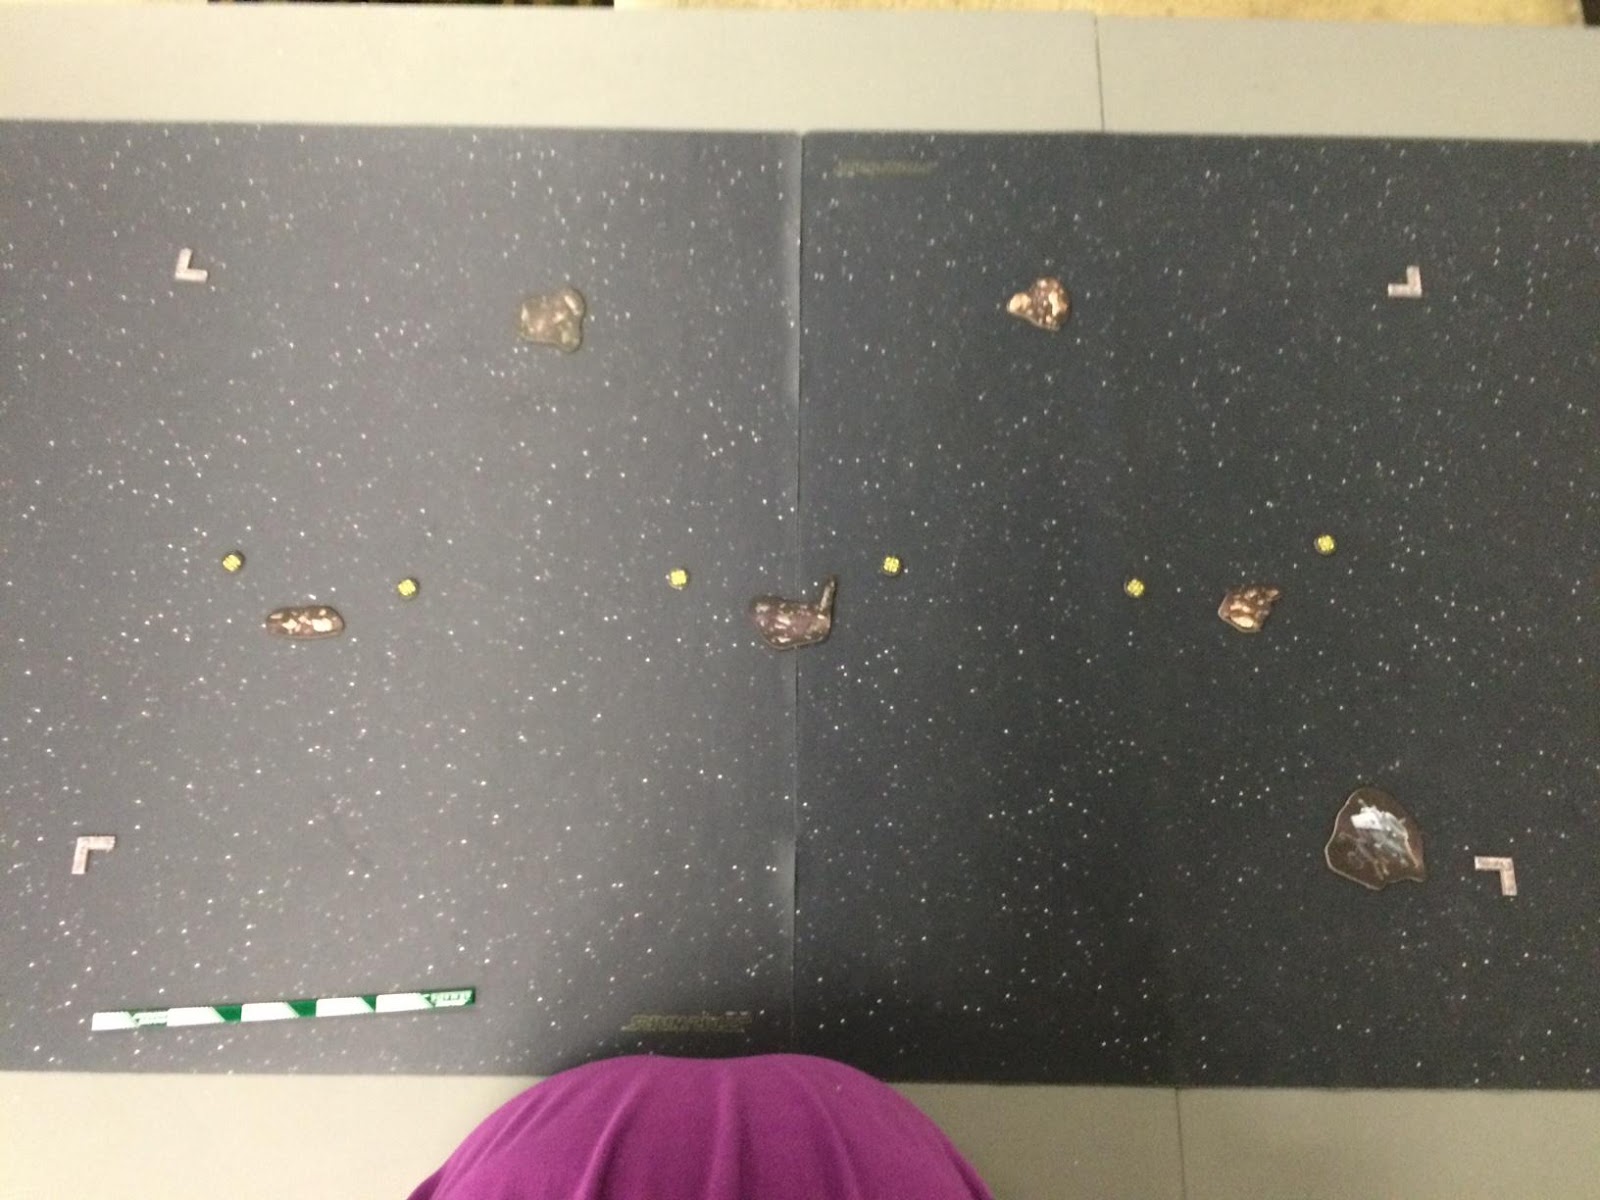
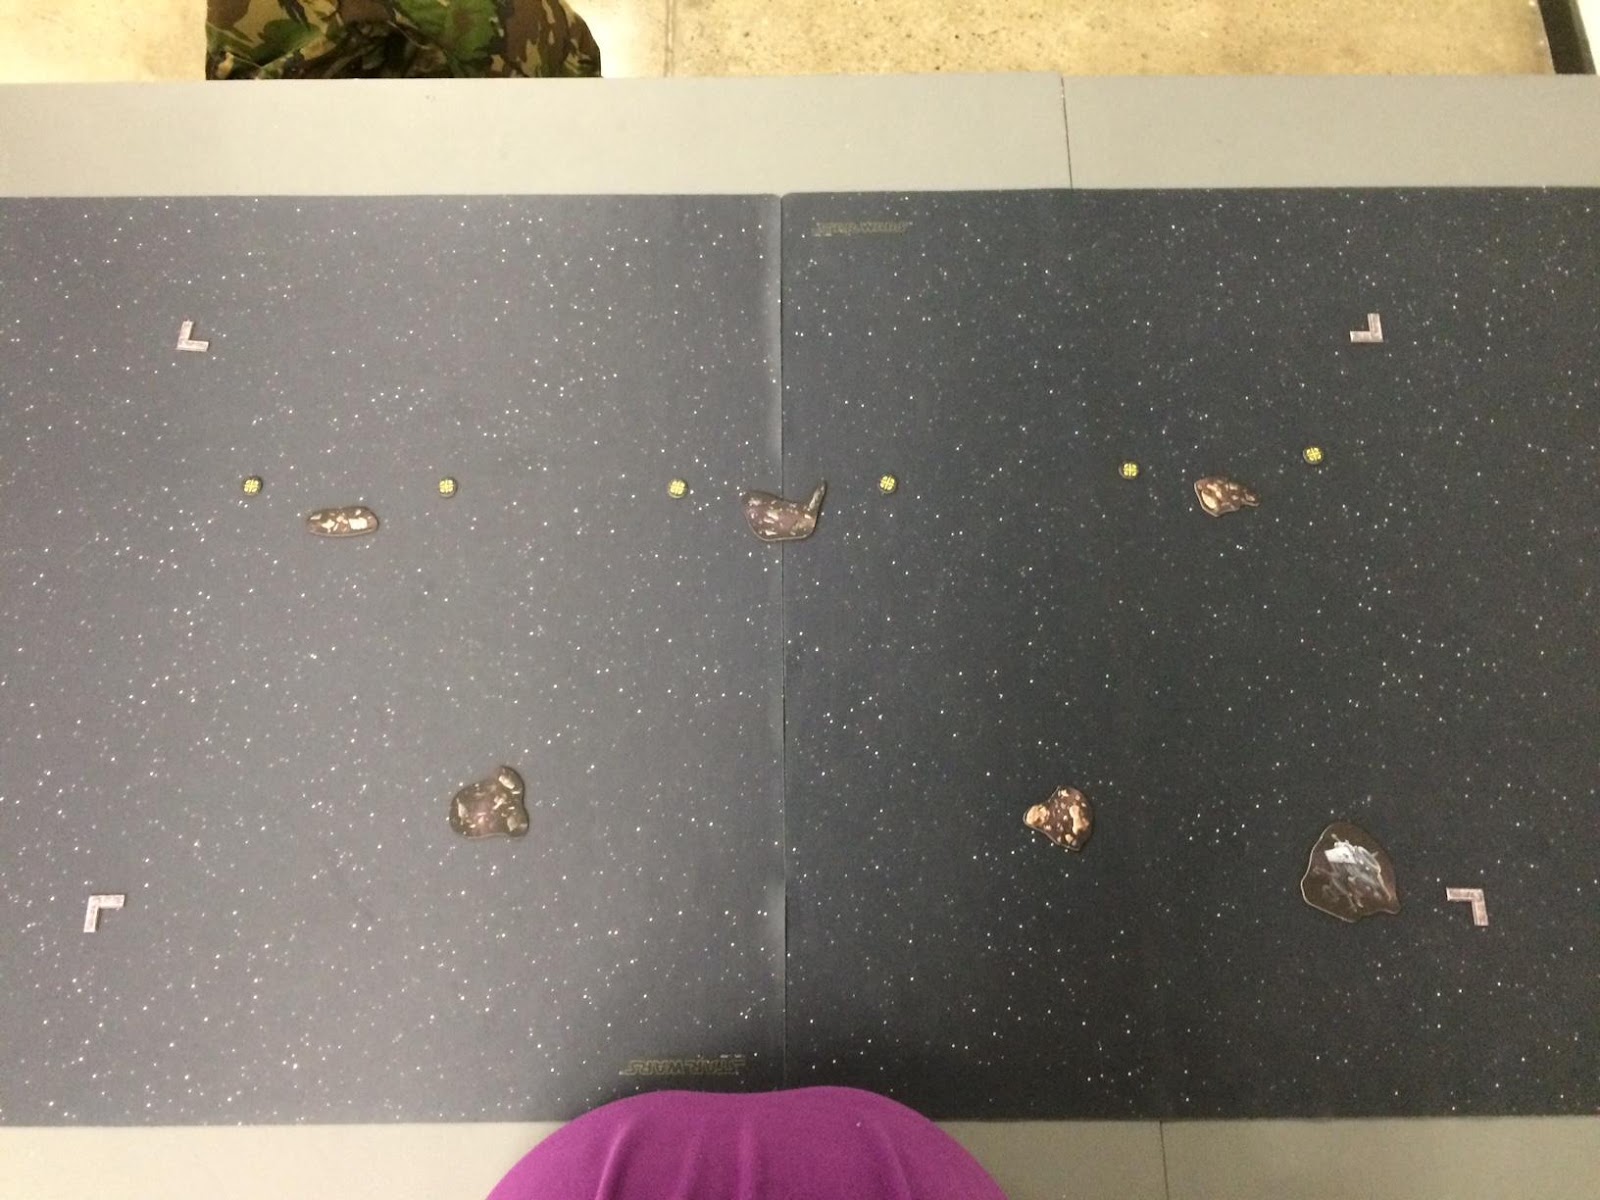
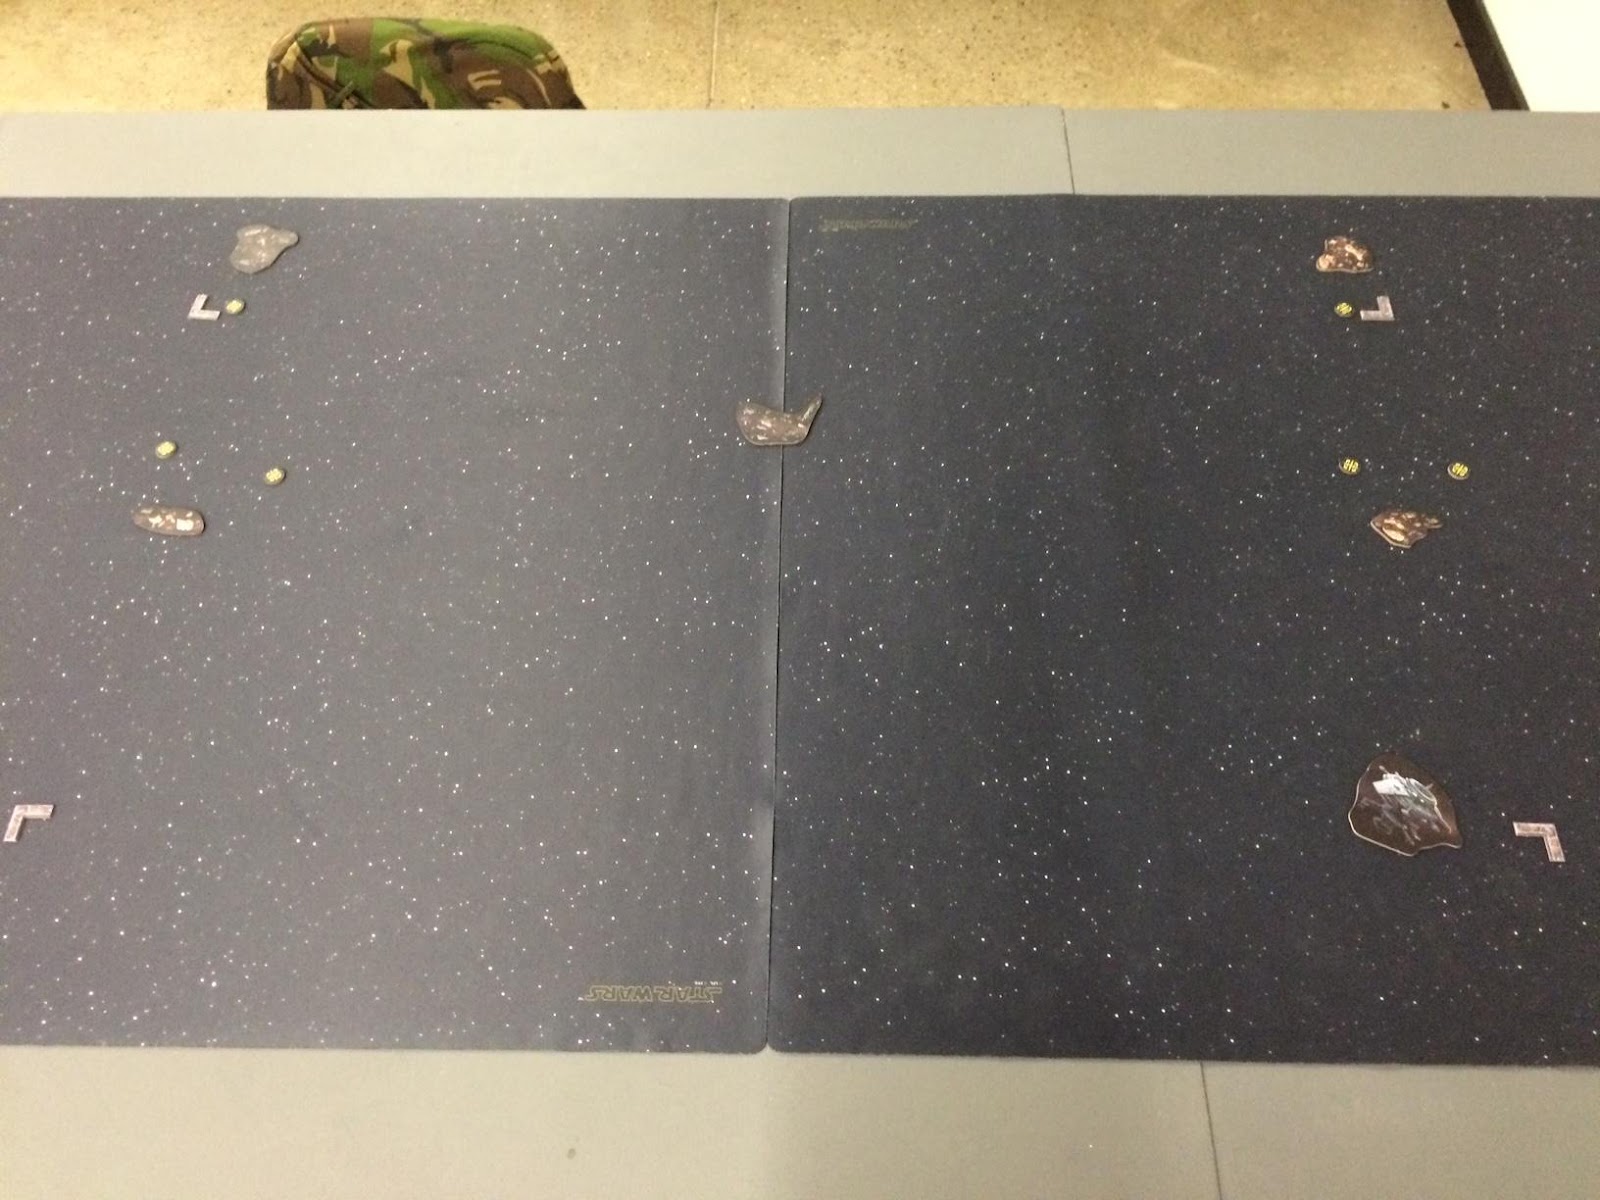
When you deploy the obstacles and mines for this mission, there are three basic strategies to consider.
Trap the Middle
Putting a lot of damage into the middle (or one side) of the board and forcing an opponent to go around or through.This works best if you are playing a rebel list that likes to move in swirl or C shaped pattern and your opponent is not.
The idea here is to create a wall of damage and misery for your opponent to cross over in order to fight you. This is especially good against the Empire who want to keep you in their front arc or against squadron heavy lists that require activation to be effective. Additionally, this strategy completely screws the Demolisher Title’s effectiveness as two mines can kill a Gladiator on a bad role.
The idea here is to create a wall of damage and misery for your opponent to cross over in order to fight you. This is especially good against the Empire who want to keep you in their front arc or against squadron heavy lists that require activation to be effective. Additionally, this strategy completely screws the Demolisher Title’s effectiveness as two mines can kill a Gladiator on a bad role.
Crowd Their Deployment Zone
Good against most lists and a solid default, but excellent against CR-90 and other small ship spam lists. The goal is simple: put all the mines in or just outside of your opponent’s deployment zone. The mines and obstacles will hopefully damage or even destroy a few ships before turn two.
End Zones
Similar to trap the middle, but used to exclude both sides of the board outside of the deployment area. This is great if you play a list dependent on forward arcs and your opponent does not.
Done properly this deployment will allow your Victory Class Star Destroyers to wreak havoc on Admiral Ackbar and company.
Now comes the tricky part, support your minefield, but don’t get blown up. If you place all those obstacles and objective markers perfectly, but don’t fly close enough to shoot an opponent who has just detonate a mine or two or (if you’re really lucky) three, then you’ve wasted the opportunity presented by the objective. While it is annoying to your opponent to have to spend their command dials and/or tokens on engineering, it is something they can plan for.
So, what do you do? Make the terms of the engagement cost your opponent more resources than yourself by maintaining pressure on their ships and squadrons while the terrain does the extra work for you. Follow these guidelines:
Plan to be in your ship’s preferred range the turn your opponent hits the minefield. Ideally, you’re opponent will think you’re going to hit the mine. They may slow down or alter course to capitalize on their perceived advantage, but a navigation command or token will allow you to slow down or turn away at the last second. This is generally enough to trick an opponent into flying straight into the mine.
Make sure your activation economy is favorable. You’re going to be player two, make sure your opponent as to activate a ship that will clear the mines out of your way. If you’re are playing with less activations, then play defensively. Let them it the wall first and suffer the damage even if you don’t engage until turn three or even four.
Send your squadrons though to soften up the targets even more. Whether it’s rogues, TIE fighters or A-Wings, ordering them through the danger zone without penally to strip off some shields, harass your opponent, and encourage them to engage you on your terms is very helpful for this mission. Remember this game is about ships; all squadrons are ultimately pawn sacrifices.
No one commander is best suited to this mission. But a handful offer a better advantage than their counterparts.
My favorite commander with this mission is Tarkin (though I’ll say that a lot) in this mission he lets you take the concentrate fire command AND the navigation token at the same time. Slowing your ships just outside of the minefield’s range while weakening your opponent’s ships as they sail to glory.
Ozzel lets you pull of some swanky and annoying feints with this mission. The only problem is your opponent might see it coming. So, be prepared to have a follow up tactical decision should your first maneuvering trick fails.
Motti offers a solid choice as your can afford the hull damage (even on smaller ships) to use the minefields as a surprise. Most players will not seriously consider the idea that an opponent with simply roll through the minefields, tank the damage, and consequently catch them out of position.
Dodonna is the best choice for the Rebels as the increase chance of the right face up damage card at the right moment are improved by dealing out some much punishment.
Ackbar is well Ackbar. He’s my overall favorite, and the guy that let me win a lot early on. While minefields doesn’t specifically give him and edge, he’s always a great choice.
I hope this was somewhat helpful and informative. Until next time—She’s Got Admiral Ackbar Eyes.
Done properly this deployment will allow your Victory Class Star Destroyers to wreak havoc on Admiral Ackbar and company.
Support Your Minefield
Now comes the tricky part, support your minefield, but don’t get blown up. If you place all those obstacles and objective markers perfectly, but don’t fly close enough to shoot an opponent who has just detonate a mine or two or (if you’re really lucky) three, then you’ve wasted the opportunity presented by the objective. While it is annoying to your opponent to have to spend their command dials and/or tokens on engineering, it is something they can plan for.
So, what do you do? Make the terms of the engagement cost your opponent more resources than yourself by maintaining pressure on their ships and squadrons while the terrain does the extra work for you. Follow these guidelines:
Plan to be in your ship’s preferred range the turn your opponent hits the minefield. Ideally, you’re opponent will think you’re going to hit the mine. They may slow down or alter course to capitalize on their perceived advantage, but a navigation command or token will allow you to slow down or turn away at the last second. This is generally enough to trick an opponent into flying straight into the mine.
Make sure your activation economy is favorable. You’re going to be player two, make sure your opponent as to activate a ship that will clear the mines out of your way. If you’re are playing with less activations, then play defensively. Let them it the wall first and suffer the damage even if you don’t engage until turn three or even four.
Send your squadrons though to soften up the targets even more. Whether it’s rogues, TIE fighters or A-Wings, ordering them through the danger zone without penally to strip off some shields, harass your opponent, and encourage them to engage you on your terms is very helpful for this mission. Remember this game is about ships; all squadrons are ultimately pawn sacrifices.
Commanders
No one commander is best suited to this mission. But a handful offer a better advantage than their counterparts.
My favorite commander with this mission is Tarkin (though I’ll say that a lot) in this mission he lets you take the concentrate fire command AND the navigation token at the same time. Slowing your ships just outside of the minefield’s range while weakening your opponent’s ships as they sail to glory.
Ozzel lets you pull of some swanky and annoying feints with this mission. The only problem is your opponent might see it coming. So, be prepared to have a follow up tactical decision should your first maneuvering trick fails.
Motti offers a solid choice as your can afford the hull damage (even on smaller ships) to use the minefields as a surprise. Most players will not seriously consider the idea that an opponent with simply roll through the minefields, tank the damage, and consequently catch them out of position.
Dodonna is the best choice for the Rebels as the increase chance of the right face up damage card at the right moment are improved by dealing out some much punishment.
Ackbar is well Ackbar. He’s my overall favorite, and the guy that let me win a lot early on. While minefields doesn’t specifically give him and edge, he’s always a great choice.
I hope this was somewhat helpful and informative. Until next time—She’s Got Admiral Ackbar Eyes.